Showing posts with label baking. Show all posts

Thursday, October 20, 2011

DIY Food Adventure Menu: Lunch and Snack


Entering the Third Trimester


So now I am in my 29th week of pregnancy, just starting the third trimester.  I can understand how the second was the best (and third is the one with the hairy chest?  No, thankfully, no!) and now it starts to get a little more challenging to move around and do the things I am used to doing--like tying my shoes and sleeping :)  I am also a bit more tired and breathing hard easily, which often makes me laugh at the gym when 10 reps of even something light makes me pant.

But the little one is moving around like crazy and the movement is so much more interesting just in the last week.  I can see huge softball-sized pushes stretching out my belly and moving across and he taps, or seems to rhythmically softly kick or tap his hands too slow to be a heartbeat and too fast to be hiccups.  At least I think so.  He is still flipping around and squirming and loves to bop around in my belly whenever I am at rest and sometimes even when I am not, which feels really strange.  Imagine the entire contents of your belly flip-flopping while you walk.  There is nothing in the world quite like it...  He is quite the entertainment for me and my husband :)

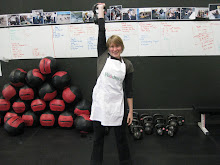
I've been keeping active, although my gym workouts have been reduced to 3-4 days a week.  I love to take walks on West Cliff (pictured above) with my husband when he gets home from work and try to do something every day.  I definitely believe that diet and exercise are key to a healthy pregnancy.

I am still keeping up with the DIY Food Adventure through my gym: CrossFit Santa Cruz by making my own food for the majority of my meals and I don't plan on stopping.  It has been the best thing for me and my pregnancy.  My diet is the same, but I have been gaining weight pretty well after that initial slow period during the first to mid-second trimesters.  Now I have already gained 30lbs (!), but I am not eating significantly more and I have if anything tightened up my diet to include fewer weekend cheats on desserts.  I know they make me feel so crappy the next day that I have been trying to have some fruit instead, and the figs in season right now are my favorite.  I can't believe I waited so many years to have raw figs!  They are divine!


I've taken to having broth and a banana for breakfast, an egg scramble (with carnitas if I have some) or just eggs with grapes or apples for second breakfast/lunch, and then the lunches/snacks given below.  I make sure to get in some fresh veggies with at least one or more meals and to eat 3-4 meals a day.


Lunch 


One of my go-to lunches is basically pizza without the crust.  I broil heirloom tomato slices topped with cheese (whole milk mozzarella was a favorite, until my store switched over to part-skim :(--now I like the Farmer's cheese) and pepperoni (such as Applegate brand--a lesser of evils in the processed meat world) and then savor that ooey-gooey deliciousness.  I usually serve it alongside sliced bell peppers (I've found that the smaller they are, the sweeter, and the yellow seem to be sweeter than the red) and cucumbers (the smaller the better on these too).


I have also been known to indulge in Grain-free Biscuits from Food Renegade as sandwiches or open-faced sandwiches with Farmers cheese or an omelet.  I have it alongside loads of raw veg. and/or grapes or cinnamon apples cooked or microwaved with grassfed butter.  


As it gets chillier and cooler, wetter weather descends on Santa Cruz, I'll definitely be adding Heirloom Tomato Soup to my lunch repertoire.  

Snack

I often throw together something quick and take it on the road.  A roasted chicken leg and thigh, some home-roasted and salted cashews, and an apple is an easy meal-on-the-go.  This replaces that handy, delicious Perfect Foods bar I so often fell back on in the past.  Sometimes I'll switch this out with a couple hard-boiled eggs or leftover grassfed beef burger and sub carrots for the carb. 


Keeping hydrated is also something to think about, not just while pregnant.  Pregnancy dulled my love of teas, so I am down to water and this time of year, it can be tricky to guzzle enough cold water on cold days.

I used to like a can/bottle of coconut water post-workout as a great thirst-quencher addition to water with the added electrolytes, but I'll get over it.  I am not relying on even those probably minimally-processed, one-ingredient foods anymore.  Instead, I try to drink some lemon water with salty food or add a pinch of salt to lemon water to get electrolytes back.  I absolutely LOVE lemon water, but it does tend to make me thirsty for more--which is a good thing if I am dehydrated and just can't suck down enough plain, cold water.

Oh and while lemon seems acidic, it is actually a base to your body, so it can counteract some of the high acid load of meats and fruit as a base like veggies.  Founder of the Paleo Diet, Dr. Loren Cordain, has a wealth of information about the integral acid-base balance and how that super-acid diet is a recipe for metabolic disorder.  

For more on making your own sports drink for electrolyte replenishment, check out this post by Primal Girl in a Modern World: Easy Sports Drink Recipe (and skip the stevia--you don't need it). 

And a drink-snack:

When out and about on weekends or as a nice relaxing wind-down to the weekday, we make a trip to the local coffee shop Verve, which has become a destination for my husband and I.  Despite my love of their atmosphere, throughout my pregnancy I have had an aversion to coffee (which is fine since I shouldn't have caffeine anyway) and even my old favorite teas.  Instead of being lame and just sipping water there, I recently found a new love: the steamer--steamed organic milk with their homemade whip cream and a splash of sweetener (if any).  This is a fun indulgence for me at the coffee shop, and if you are in the Santa Cruz area and want the best coffee around, you HAVE to stop at Verve Coffee Roasters.  You won't be disappointed :)

Finally, check out your local meat market for some great ideas when you are stuck in a meat rut.  We have El Salchichero that specializes in grass-fed and pasture raised meats.  I absolutely love their chicherones (pork rinds) and have been known to indulge in their creative sausages as a change in the lunch/snack routine.  While not quite homemade, they are still local and use quality ingredients and I always cook the sausages, usually having them with eggs.  Quality meat definitely makes a difference!


Friday, November 6, 2009

Given Up Bread--Think Again!


No, you have not entered the Twilight Zone.  Bread can be had paleo-style with such simplicity and omg results that perhaps we are in another dimension!  I call this dimension Dangerously Delicious Delectables!

What's the danger?  Well, gluttony for one.  It is hard not to over-indulge with something so hard-wired into our brains as bread (dude--it was an essential part of my every meal growing up in New Jersey suburbia).  When I first made a loaf, I totally sat down and ate half of it.  No kidding.  I was just crazy with glee that bread could be had while not breaking the tenets of no sugar, no grains, and no dairy.

Here is my inspiration: Elana's Pantry's Gluten Free Sandwich Bread.  Her recipe creates a great bread, but to me, I wanted more flavor and rise since mine came out more biscotti-shaped than loaf-like.  I don't have a mini loaf pan or her mail-order almond meal, so perhaps that led to a good, but not great loaf.

I wanted to create a bread the masses could enjoy (paleo and non-paleo alike) with store bought almond flour/meal (I use Trader Joe's since it is the cheapest and that stuff can get quite pricey!) and a flavor profile I have been dying for.  Onion Bread.  Oh yeah, it is just like, nay, BETTER than that onion bagel you probably haven't had in years or that soft onion bread that makes a to-die-for sandwich bread.  And ready in 45 minutes with minimal prep and cleanup--doesn't get much better than this!  Sink your canines into:


(shown toasted and crunchy!)

Paleolicious Onion Bread
Dare you to try this and not close your eyes and revel in its soft, moist onion-breadiness!
Cooking Time: about 45 minutes start to finish!

The Dry
2 c almond flour/meal (I used Trader Joe's)
1 c arrowroot powder (you can find this at New Leaf and perhaps Whole Foods in the bulk bins)
1/2 t salt
1 t baking soda
2 t cream of tartar
1 T dried onion
1/4 t (or 10 fine grinds) of black pepper

The Wet
4 eggs (room temperature or place in lukewarm water while you prepare so they come to room temp)
1/2 c extra virgin olive oil
1/2 c or 4 stalks of scallions/green onions, chopped thinly

Preheat your oven to 350 degrees.  Grab your loaf pan and cut two pieces of parchment paper to line the pan: one should span the narrow sides and extend past the lip and the second should do the same on the wide sides.  Why?  No mess!  No worry about stickage!  You can just pull the tabs to remove the loaf when finished without playing pop out the loaf onto the floor as you shake it or jimmy it out of there.  Definitely a time and effort saver!  I just cut two pieces of parchment to accomplish this, but here is another way that creates a pattern out of the parchment.  I will have to try this next time!

Ready for the action?  It is so easy it is embarrassing.  Add the dry ingredients to a large bowl (Note: to avoid the use of a sifter with the cream of tartar that likes to clump, just break it up between your fingers as you add it).  Mix well.  Add the wet ingredients to a second bowl.  Mix well and get some air into those eggs by whisking with a whisk or fork to create some bubbles.  Hey, since we can't use baking powder (contains corn) and don't want to bother with whipping egg whites, we'll take all the leavening we can get!  Now for the hard part.  Just kidding!  Dump the wet into the dry and mix to incorporate.  Now scoop into your loaf pan being careful to keep your parchment liners in place, and whack it in the oven for 30-40 minutes.  I turned my oven up to 355 upon adding the loaf so that it would kick on.  Check at 30 minutes (or 25 if your oven errs on the hot side).  You are looking for a hard top crust and a skewer that comes out mostly if not completely clean.  There should be NO wiggle to the loaf.  Once done, remove from the loaf pan and set on a wire rack to cool for a good hour or so.  Slice and enjoy once you can wait no longer!  Store in the refrigerator wrapped in paper towels and placed in a plastic bag.  It'll last a week (or more?) if you can ;)

Endless Serving Suggestions:

Yeah, go ahead and have that sandwich you have been dying for.  Now you don't have to feel guilty!

Oh, imagine it dipped in Basic Meat Sauce (perhaps with the addition of some veggies to make the sauce a meal)!

Or, if you are indulging on dairy, slather it in raw, grass fed butter!

How I have been indulging lately:


Yes, those are farmer's market eggs and Aidell's chicken apple sausage (processed yes, but still fits the requirements and is really good) atop toasted slices of Paleolicious Onion Bread.  Oh yeah!

Thursday, October 29, 2009

Smashing Pumpkins


Pumpkins and all types of squashes abound right now during the fall harvest and in the spirit of  Halloween.  I have tried to tackle squash as a savory dish on multiple occasions, but I have never been crazy about the outcome.  There is just something so sweet about most squash that they beg for sweet applications.  Even wrapping squash cubes in bacon didn't win me over, which is insane because bacon is supposed to make everything better.  Well, I give in.  I'm not trying to fit a round squash into a square hole anymore.  I am going to use it as its sweetness begs: for dessert!

Scrumptious Squash

Squash is very nutritious for obvious reasons: it's a brightly colored vegetable (well, botanically speaking it's a fruit).  Bright color means beta carotene (think carrots), which has anti-inflammatory and antioxidant properties.  As an anti-inflammatory, beta carotene helps reduce the symptoms of asthma and arthritis.  Beta carotene also deters plague formation by keeping cholesterol from oxidizing and building up on the walls of blood vessels; thus, it protects against heart disease.  It also protects us against cancer, especially colon cancer (which is further aided by squash's folate and fiber content).  Furthermore, beta carotene plays a role in blood sugar regulation, thereby protecting against diabetes and insulin resistance.  Squash is also high in fiber, aiding our digestive inner workings.  The Vitamin C, manganese, folate, and potassium content in squash is also quite respectable.  Bottom line, it's nutritious!

Squash is a perfect paleo food for getting sweetness out of your food, not adding it to your food.  According to its single listing on the international table, pumpkin's glycemic index value is 75, which is a little high (higher than 50 is considered high glycemic), but being a watery, fibrous plant, it has a low, low glycemic load of 3 (I have seen various numbers for different winter squash, but all less than 10).  Remember, when we last talked about blood sugar, we defined these terms.  Glycemic index is how fast a food is broken down into glucose, which raises your blood sugar, and since pure glucose is 100, we try to avoid foods higher than 50 on that scale.  However, we can't dismiss glycemic load, which takes into account the percentage of carbohydrate in the food that is responsible for the spike.  In pumpkins, it is low (less than 10 is considered low glycemic load, 20 or more is high).  Squash fall into the same category as watermelons (a relative) that, while sweet, have so much water and/or fiber that their glycemic load is negligible.

This inherent, but not dangerous sweetness is something we can enhance with flavor compliments like apple and banana.  I find it gratifying to add sweeteners that contribute to the flavor, not just add sweetness.  They also add their own host of vitamins and minerals, which trumps honey, agave, and traditional sugars any day.  Period.

Main Reference: The World's Healthiest Foods

Preparation S

First off, you can buy canned pumpkin, but it is really simple to make your own and so much better for you and the environment if you rely less upon processed foods.  When choosing squash, go for the sweetest you can find.  Sweet varieties include the sugar or pie pumpkin (small jack-o-lanturn type), kabocha squash, butternut squash, acorn squash, Hubbard squash, calabaza squash, buttercup squash, or the oddly named sweet potato squash.

Roasting a squash is really easy.  Check out Elana's Pantry's step by step guide for pictures and more details, but here is the gist: Preheat your oven to 350 degrees.  In the meantime, wash the squash and cut it in half (this is tricky with hard rinds, so be careful and use a big, heavy knife!).  Scoop out the fibrous, seedy innards and try to fish out the seeds to dry and roast, if you are up to the challenge.  Place the cut halves face down in a baking dish with 1/4 inch of water in the bottom.  Roast for 30 minutes and give them a check.  You are looking for fork-tender flesh all the way to the rind.  If you got it, great--allow to cool and then scoop out the roasted squash with a spoon.  Why a spoon?  Because it'll 'urt more.  [sorry, couldn't resist lapsing into my Robin Hood: Prince of Thieves recital :)]

Now you have your roasted squash!  What can you do with it?  Bake muffins!

How about muffins sweetened only by a mere 3 tablespoons of apple juice and 2 bananas?  Is that not awesome?!


Pumpkin Chai Spiced Muffins
Like sipping a steaming, hot mug of chai, these muffins will delight your senses.  
Cooking Time: about 45minutes start to finish
Quantity: more than a dozen, so I have to bake in two batches!

Wet Ingredients:
1 c roasted pumpkin (see above to prepare)
2 over-ripe bananas, break each into 3-4 chunks
1 T vanilla
3 eggs
3 T apple juice

Dry Ingredients:
1.5 c almond flour
1/2 c coconut flour
1 t baking soda
2 t cream of tartar
2 t Ceylon cinnamon
1/2 a nutmeg, grated
3/4 t ground ginger
3/4 t ground cloves
1 t salt

First, preheat your oven to 350 degrees and prepare your muffin tins/cups.  I have had success with using cut squares of parchment (see pic in my last muffin recipe) in the cups as makeshift (read: cheap) muffin cups, but they are really annoying to keep in place while trying to dish in the batter.  If you are really into baking, you can splurge on silicon muffin cups at $13 for 6, which then need no fussing or even a muffin tin (they can bake on a cookie sheet!).  I just got mine and am so enamored with them!  Or go ahead and trust your nonstick muffin tin one more time.  These things just tend to fail after a few uses, but go ahead and live on the edge if you must.  Just be sure to grease liberally with coconut oil and don't tell me I didn't warn you if they stick.

Okay, now that you have your oven cranking, muffin tins/cups prepped, and ingredients assembled, let's make muffins!  Add the coconut flour and cream of tartar to a sifter (or food processor) and sift into a large bowl (or whirl in your food processor to combine, then add to your bowl).  Sifting the coconut flour and cream of tartar ensures none of those annoying clumps that are so difficult to mix out.  Skip this and you'll be squashing beads of coconut flour and cream of tartar for the next five minutes, seriously.  Next, add the remaining dry ingredients to the bowl and mix throughly.  Then, add all the wet ingredients to a food processor and pulse until you break up the banana and squash.  Scrape down the sides, then, let 'er whirl for a minute to lighten the color a bit and puree everything evenly (you might need another scraping and whirl to accomplish this).  Give your wet ingredients a final whirl to aerate them (you should see bubbles when you lift the lid) and add them to the dry ingredients.  Mix to evenly incorporate.  

Dish your batter into muffin tins/cups and bake for 25 minutes, then check for any wetness on the top, giggliness, or too light a top color--if present, give them 5 more minutes, then retest.  Mine took around 30 minutes and their tops just started to turn a more golden brown with stray spills looking a bit burnt.  After finished, remove and cool on a rack (note: don't try to get muffins out of their cups (parchment or silicone) until after they have cooled).  Store in an airtight container in the refrigerator with some paper towels underneath and above them to soak up excess moisture.  They'll last a good few days if you can resist them!

Tuesday, September 29, 2009

Five Dollar Muffins


UPDATE 9/30/09: Tried a batch today using hazelnut oil and 1T vanilla instead of 1tsp and made 12 regular sized instead of 6 huge ones, taking between 15-20min to bake.  They are delicious!  So I am changing the recipe below to account for this new tweak.  Enjoy!

When I think of these muffins, I think of the $5 hamburger commercials.  Something has to be a big deal to be worth $5, and these muffins are worth that or more.  Depending upon how you like them, they can be oooey-gooey on the inside and actually improve with refrigeration.  Good luck saving them for long!

The Ultimate Banana Walnut Muffins
Makes 6 huge muffins or 12 regular sized
Cooking Time: 30-45 minutes start to finish
Zone Blocks: 6 blocks of Fat for each muffin when making a batch of 12, 1.5-2 blocks of Carb and 1/4 block of Protein--so basically call each of these a 6 block Fat.  


Dry Ingredients:
2 C almond flour/meal (NOTE: I use Trader Joe's Just Almond Meal brand since it is cheapest.  Other almond flours might turn out differently, so feel free to experiment!)
1/3 C coconut flour (sifted gives the best results since it clumps easily)
1 tsp baking soda
1 tsp salt
1 tsp cinnamon
1/2 tsp nutmeg (grated fresh)
1 C walnuts

Wet Ingredients:
2 bananas, the riper the better
1 T vanilla
3 eggs warmed to room temperature
1/3 C honey
3 T oil (olive oil is fine, coconut oil when liquid is excellent, and hazelnut oil or walnut oil hits it out of the park!)
2 T almond butter (unsalted, but if salted, just add 3/4 tsp salt instead of 1 tsp)

Preheat oven to 350 degrees and place walnuts in preheating oven on a sheet rack to roast.  Watch them carefully--too many times have I let them burn and ruined a whole batch!  Meanwhile, peel bananas and mash them to a liquid (can be chunky) in a medium-sized bowl.

To the bananas, add honey and almond butter and mix well.  Next, prepare the eggs.  I usually crack them in another bowl to avoid stray shells, then mix them there before adding to the other wet ingredients, for better mixing.  Add those eggs, the oil, and vanilla to the banana bowl; mix to incorporate.  (Check walnuts!)

In a separate bowl, add almond flour, coconut flour, cinnamon, nutmeg, salt, and baking soda.  Mix to incorporate.  (Check walnuts!) Prepare your muffin tin.  You'll notice that I have a non-stick muffin tin, but the non-stick quality only lasted a few batches before stickage ruined the bottom of enough muffins that I gave up on it.  I need to buy muffin cups! In the meantime, I use homemade (read: lazy) parchment paper "cups" that only stay put once batter is scooped in them.  Not ideal, but they work.  If using a naked muffin tin, grease it with the same oil you used in the batter (or try mixing and matching, what the heck!).

By now your walnuts are either burnt to a crisp or you rescued them once golden brown and fragrant (I always think of the host of Good Eats, Alton Brown, saying "I smell nuts!").  Chop them up into tiny bits, but not dust.  I have found that knives pale in comparison to crunching them with a metal spatula or even a bench scraper.  The bottom of a bowl or cup will also do.  Measure out a cup or so of roasted, chopped walnuts.


If your oven is preheated, you are good to go: add the wet to the dry and scrape the bowl.  Mix well and add walnuts.  Don't worry about mixing so much that you make rocks of your muffins since we don't have to deal with temperamental gluten here, but I still stop when just incorporated evenly, just in case.  Dollop into muffin cups (see pre-muffins pic above) and bake for about 20 minutes if making 6 huge muffins or between 10-15 if smaller.  Check for golden brown color and mostly set tops.  I love oooey-gooey ones, so I never bother with the toothpick test or completely set tops.  Cool on a rack.  Store in an airtight container in the fridge once cooled.  They won't last long due to extreme deliciousness, not spoilage!

Thursday, September 24, 2009

Pancake Heaven


On my kick of trying to make paleo substitutions to appease my flour-bred brain, I found these DELICIOUS gems at Elana's Pantry--a gluten-free cooking site.  I absolutely LOVE Elana's recipes, and SO wish I found her while I was living in her city of Boulder, CO.  However, gluten-free is a slippery slope when searching for paleo-style recipes.  On searches through other sites you have to weed through all the recipes using alternative grains, chemically derrived artificial sweeteners, and processed to oblivion fats that make gluten-free frankenfoods just as harmful or even more so than their flour cousins.  So finding these pancakes and other delicious recipes on Elana's site was a god-send.  She gets it.

Pancakes from Heaven
slightly adapted from Flapjacks
Cooking Time: 15 minutes

2 eggs, room temperature (warm using a warm water bath or leave out prior to cooking)
1/8-1/4 C honey
1 T vanilla extract
1/2 C water
1 and 1/2 C almond flour/meal
1/2 tsp kosher salt
1/2 tsp baking soda
coconut oil (for cooking)

Using a blender, combine the wet ingredients: eggs, vanilla, honey, and water.  Blend until smooth.  Then, add the dry ingredients: almond flour, salt, and baking soda.  Blend until smooth.

Heat a non-stick skillet over medium heat (I had to crank mine up to med-high to get it going, then back down to med-low or lower by the time I reached the last batches--but that could be my stove).  Add coconut oil and swirl to melt and distribute.  Pour pancake batter onto the skillet to get your desired size of pancakes (I found that smaller is better and was able to fit 4-5 sand-dollar sized pancakes in my large skillet).  Wait until you see bubbles bursting from the center of the pancake before turning (I had some trial and error with this--the bottoms cooked fast and the tops stayed liquid, making for a messy flip).  The upright side should be golden brown (not burned) and crusty/crunchy.  Yum!  Wait until the underside is browned before removing and continuing the process with the remaining batter.

I got a slew from this recipe, around 12 depending upon the size.  Keep the removed pancakes warm using a warming burner or oven set to warm.  It helps to put a moistened paper towel on top to keep them from drying out.

Once done, you don't need any syrup.  Let me say that again since it came as a surprise to me too: You don't need any syrup!  They are delicious as is and a great accompaniment to eggs (in background of next picture)!


Wednesday, September 23, 2009

Bread Worth Craving


As a paleo dieter, bread is out.  Grains are the enemy, and "eat meat, not wheat" is our battle cry.  However, I have found a bread to fill the void.  It is one that I actually prefer over all but the most crusty and homemade of breads.  Rival to naan in its simplicity, versatility, and delectability.  I give you Flaxbread!


Italian Flaxbread
inspired by Paleo Focaccia, Sandwiches and Cakes by Nikki Young.   
Cooking Time: less than 30 minutes


2 cups ground flaxseeds (store these in the freezer since they go rancid easily)
1/4 tsp baking soda
1/2 tsp cream of tartar (see NOTE)
4 eggs (room temperature is best, so put out early or warm in a warm water bath)
1/2 C water or chicken broth
1/3 C olive oil with Italian Seasoning Mix mixture leftover from Roasted Turkey Breast


Italian Seasoning Mix:

3 sun dried tomatoes (chopped), 1T each of rosemary (crushed), oregano, basil, kosher salt, garlic powder, onion powder/chopped dried onion, 1tsp each of pepper, red pepper flakes
(NOTE: make more of this seasoning than you need, add olive oil, and store in the refrigerator for other uses like salad dressing and Roasted Turkey Breast seasoning)

Preheat the oven to 400 degrees and combine the wet ingredients in one bowl and the dry in the other.  Mix each well.  Add the wet to the dry and mix to evenly incorporate the ingredients.  Using a baking sheet lined with parchment or silpat, scoop out the batter and distribute over the sheet.  Using a spatula, try to make a nice even layer without holes.  This is difficult since the batter is sticky!  Wack it in the oven for about 20 minutes and see where it is around 15 minutes in.  You are looking for browning on the bottom of the edges and a more golden look to the surface of the bread.  Once finished, cut into slices, cool on a rack, and then store in an airtight container in the fridge.

Uses:

Sandwich bread--this flavorful bread beats wheat bread hands down

Bread to accompany spaghetti night or curry night (try using an Indian spice mix instead of Italian)

Snacking

Open-faced sandwiches


Since this is nearly ALL fat, try to use it with meals that don't have any other fat or when you are splurging paleo style.  Making your meat without using fat such as on the grill or searing in a pan will allow you more leeway with fats in other parts of the meal, such as this bread.  This is definitely worth the indulgence!

NOTE: The original recipe from the paleo cookbook called for baking powder.  Baking powder is not technically paleo since it is made from corn.  Another alternative to using baking soda and cream of tartar is to whip the eggs into stiff peaks and fold them into the batter, or add baking soda and an acid to make it work, perhaps a honey bread, cocoa bread, or lemon bread.  The first picture is from an experiment in that realm using coconut milk.  I think this would make a great sweet application, so more experimentation is needed.